I was recently tasked with evaluating Content Sensitive Switching/Load Balancing solution for a client’s PeopleSoft infrastructure. The client is upgrading its current Peopletools 8.3 to 8.9 (HCM). As part of the upgrade, there has been expressed desire by management to build a fault-tolerant architecture. The growing need to increase availability requires building redundancy across every tier of the architecture. Deploying a solution that meets that goal requires a good understanding of Load balancing architecture and algorithms, and most importantly PeopleSoft Weblogic hardware requirements for load balancing. The dynamics of Load balancing a.k.a Content Sensitive Switching a.k.a Application Switching is to present a Virtual IP (VIP) address to end-users that send incoming requests to one or more back-end web servers. Traffics are then re-routed by a pre-defined algorithm (round robin) to these back-end web servers.
In addition to routing traffic, load balancing tools are typically required to perform several functions related to the routing decision -
- Monitor server loads and distribute incoming requests to balance the load across servers
- Examine the client requests to determine which server is appropriate to handle the request
- Identify the client to maintain session affinity with a particular server for e-business applications
- Maintain session persistence to enable failover to a hot standby to improve availabilityDetection and avoidance of many common denial-of-service attacks
- SSL acceleration to improve the performance of secure applications
- Simplified configuration and management
- Health Monitoring
Weblogic Load Balancer Requirements
Weblogic requires that load balancing hardware support compatible active or passive cookie persistence and SSL persistence mechanism.
I. Passive Cookie Persistence
Passive cookie persistence enables Weblogic Server to write a cookie containing a session parameter information through the load balancer to the client.
II. Active Cookie Persistence
Active cookie persistence enable Weblogic server to write a cookie containing a session parameter information through the load balancer to the client provided the load balancer does not modify Weblogic Server cookie. Load balancers that alter active cookie sessions are not supported by Weblogic.
III. SSL Persistence
When SSL is used, the load balancer performs all encryption and decryption of data between clients and the Weblogic server cluster. The load balancer then uses the plain text cookie that Weblogic Server inserts on the client to maintain an association between the client and a particular server in the cluster.
Stateless Vs Stateful Failover
Another thing that played a huge role in our decision making was the Stateful Vs Stateless failover issues. How much data loss are we able to handle if a server fails ?. Which vendor hardware provide these kind of failover solution. Invariably in our case, transaction loss was not an option.
I. Stateless Failover
Under stateless failover, if a server fails user session shall be restarted with another functioning server. All unsaved data on the failed server shall be lost but the user login will be preserved.
II. Stateful Failover
With stateful failover, user session are maintained on another machine in cluster. Weblogic Server creates a primary session state on the server to which the client first connects, and a secondary replica on another Weblogic Server instance in the cluster. The replica is kept up-to-date so that it may be used if the server that hosts the servlet fails. Stateful failover enables session resiliency during critical failure.
With these in mind, I set out to review a number of load balancing hardware offerings in the market that best fit our requirements. The following vendor offerings were reviewed – Zeus Traffic Manager (ZXTM), NetScaler, Foundry ServerIron and BigIP (f5). While most the aforementioned products offers the basic load balancing requirements – Content Sensitive Switching, Advanced Traffic Routing, Session persistence and so on. BigIP (f5) stood from the pack – Read Ben Rockwood’s blog entry on NetScaler Vs f5. Having the largest market share in the load balancing hardware market, BigIP (f5) was a familiar ground for me. I’ve worked with it in the past and it worked well. My preference for BigIP (f5) were in the following space –
Scalability - BigIP provides the most scalable hardware solution in the market. If one service is nearing capacity, scaling it is as simple as adding another instance of the service to your network and then to the BigIP load balancing pool without disruption of service. This seamless scalability feature gives it an edge over its competitor.
SSL Acceleration and Consolidation – With BigIP, you can handle SSL decryption on the load balancing hardware thereby eliminating those CPU-intensive activities at the server level. Another thing I like about BigIP is the ability to consolidate SSL certificates thereby saving money per certificate. Instead of having SSL certificates on a per server basis, you can now having 1 certificate on your load balancing hardware that handles all secured service requests
In conclusion, we went with BigIP because of its ability to scale easily and it's simplified configuration/management.



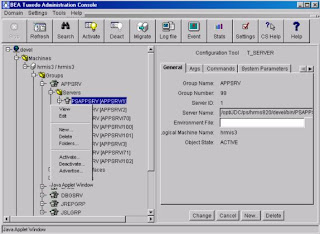
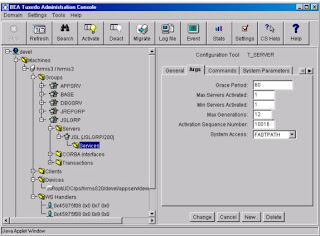 You can also make dynamic changes to JSL parameters like port number, min/max client per handler, init timeout, client cleanup timeout and so on via the Command tab.
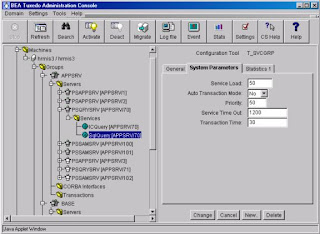
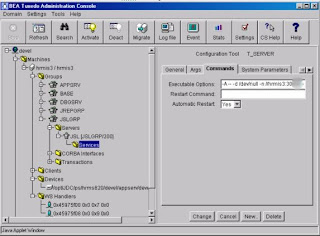 Modifying Server Process Parameters: From the Tree display on the left, drill down to server process and the service you want to change. This particular examples shows you how to change Service Time out for a PSQRYSRV process.